A Ten-Minute Drawing from One Household Object
A ten-minute drawing from one household object turns a quiet afternoon into focused practice, with a clear sequence for looking, marking, and reviewing.
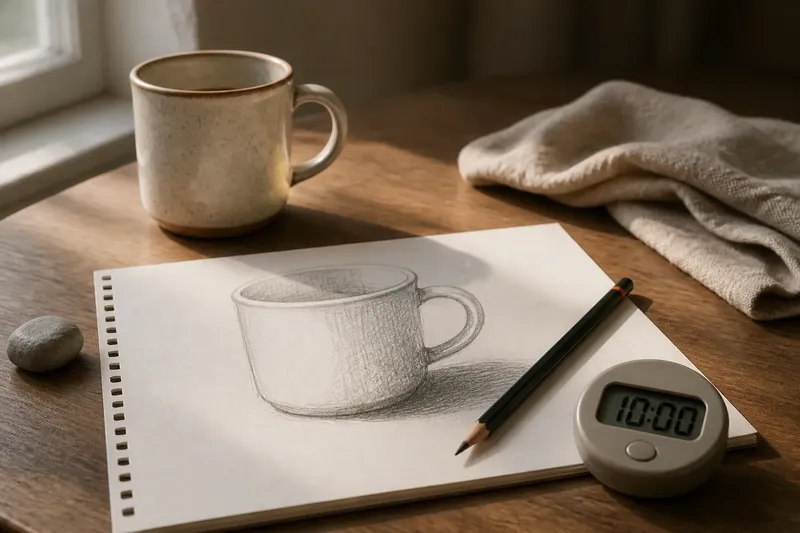
How do you make a ten-minute drawing from one household object without turning the afternoon into a small production? Put a plain mug, spoon, or folded sock on the table, take a pencil and paper, and give the object your attention until the timer rings. The point is not to produce a polished picture. It is to notice what your hand can record before your eye starts supplying what it expects to see.
What should you choose for a ten-minute drawing?
Pick one object that can sit still and has a shape you can see from where you are working. A ceramic mug, a pear, a key, or a small cardboard box will do. Choose something with a clear outer contour and at least one visible feature inside it, such as a handle, seam, opening, or change in surface. Avoid a cluttered arrangement: several objects invite decisions that this short session does not need.
Place the object on a steady surface and sit where you can see it without leaning around it. A window can provide useful light, but any ordinary room light is enough. If the object throws a strong shadow, leave it in place; the shadow is part of what you can observe, not a separate subject requiring special treatment.
Use a sheet of printer paper or a sketchbook page, a graphite pencil, and a timer. An eraser is optional. Keeping the materials ordinary makes the session easy to repeat. It also leaves you with fewer reasons to postpone drawing until you have acquired a more persuasive pencil.
How do you use the ten minutes?
Set the timer for ten minutes, then move through the session in four short phases. These are not rigid measurements of artistic progress; they are a way to keep the drawing from becoming an unplanned series of corrections.
- First minute: look before drawing. Study the object’s overall direction, its widest and narrowest areas, and where it meets the surface. Notice which side is nearer to you. Let your pencil rest while you decide where the object will sit on the page.
- Next two minutes: place the largest shape. Draw the outside contour with light, connected marks. Begin at a visible point, such as the top edge of a mug, and follow the form around at a pace that lets you keep looking back at the object. Leave room for the object’s full extent rather than letting it crowd the paper.
- Next three minutes: add the parts that identify it. Draw a handle, rim, fold, opening, label, or other feature that distinguishes this object from a generic silhouette. Check where each feature attaches and which edges are hidden. Use a few deliberate lines rather than filling every available patch of paper.
- Next three minutes: describe a change in tone or surface. Add restrained shading where the object turns away from the light, or use short marks to suggest a rough, smooth, or folded surface. Keep these marks grouped. A small patch of pencil tone can describe a turn in the form more clearly than a field of even shading.
- Final minute: stop and write one note. Put the pencil down when the timer rings. Beside the drawing, write what proved difficult to see: perhaps the angle of the rim, the thickness of a handle, or the boundary between shadow and object. The note records an observation for another session; it is not a verdict on the drawing.
Think of the pencil as a bookmark, not a paint roller. Each mark should point to a feature you actually noticed. If you cannot say what a line describes, leave it out or pause to look again.
How many marks should you allow?
There is no useful universal count, since a broad contour and a tiny crease do not take equal effort. Instead, use a simple limit: keep the drawing to the outer contour, a handful of identifying edges, and a few grouped marks for tone or texture. That gives you a boundary without requiring you to count every touch of the pencil.
When you notice a mistake, compare the drawing with the object before adding another line. Is the contour actually in the wrong place, or does it merely differ from the symbol your mind supplies for that object? If the error is clear, adjust it once with a light line. Repeatedly tracing both versions can make the page busier without making the shape easier to read.
Say you choose a metal teaspoon and notice that its bowl looks too round in your first outline. You compare it with the spoon from your seat, see that the near end is broader than the far end, and shift the contour slightly rather than darkening the original. The expected visible result is a bowl whose shape follows the view in front of you, even if the drawing remains spare.
What can you draw when the object is difficult to read?
Some household objects hide their own structure. A glossy jar can reflect a window and nearby furniture; a transparent glass can make its far edge hard to separate from the room; a soft cloth may have no single contour that holds still. Do not change the session into a hunt for the perfect subject. Choose one visible feature and let that become the drawing’s main evidence.
For a reflective object, attend to the outline and one broad change in value rather than trying to copy every reflected shape. For transparent glass, draw the rim and the parts of the side that you can distinguish. For cloth, follow a few folds from their starting points and let the rest remain open. In each case, the drawing can be selective because the session is about seeing, not making a complete inventory.
Keep the object in its original position while you work. Turning it midway changes the evidence you are trying to record. If you discover that your view is awkward, make a note of that difficulty and use the same object from a different seat in a later session.
What questions come up during a short drawing?
Can you draw with a pen instead of a pencil?
Yes. A pen makes each line more final, so begin with fewer marks and look longer before committing to them. Choose a fine pen you already have rather than making the tool choice another part of the exercise.
Should you erase a line that looks wrong?
Erase it if the line clearly misstates the object and removing it will help you see the corrected contour. Otherwise, leave it light and add the correction beside it once. A visible revision can be more useful than a spotless page because it shows where your observation changed.
What if you finish before the timer rings?
Use the remaining time to compare one feature in the drawing with the object, then add the note about what was hard to see. Do not invent extra detail merely to keep the pencil moving. Stopping early is better than decorating a drawing whose useful decisions are already made.
Can you repeat the session with the same object?
Yes, and a second view can make the first drawing easier to understand. Keep the object but change your seat, or keep the seat and choose a different household object. Record what changed in your observation rather than grading the two pages against each other.
What should you keep from the session?
Leave the drawing as it is for the moment. Beside it, keep the final note specific enough to guide your eye later: “the handle joins behind the rim” is more useful than “proportions were hard.” You can add a small arrow if the note refers to a particular place. The aim is to identify a question about seeing, not to write a review of your own ability.
If you want to make the exercise part of a quiet afternoon, place the page and pencil back together when you finish. On another day, choose a new object and repeat the same sequence. A ten-minute drawing from one household object is most useful when it leaves you with one concrete thing to look for next time, such as how an edge changes direction or where a shadow begins.
That last note is often the part worth keeping. The drawing shows what you saw; the note names what your attention missed or found difficult. Together, they give the next short session a better starting point than a vague instruction to draw more carefully.